

Peanut Butter & Chocolate Ganache Pie

Peanut Butter and Chocolate Ganache Pie
Serves 8
Always leave room for pie! 'Tis the Season for many things, not the least of which is the abundance of cakes, pies and other sweet treats to adorn the dessert table this Thanksgiving and beyond. Jamie Gorey, one half of the "Two Chicks from the Sticks" duo and the queen of "Back Home Baking", returns on Sunday, November 15 at our Midtown location for a cooking class on Heavenly Holiday Pies Hands On. Indulge your sweet tooth as you learn to make classic Pumpkin Pie, Pecan Pie, Apple Pie, and Chocolate Cream Pie. This one below is one of Chef Jamie's personal favorites!
Write a review
Print
Prep Time
35 min
Cook Time
4 hr 25 min
Total Time
5 hr
Prep Time
35 min
Cook Time
4 hr 25 min
Total Time
5 hr
Crust
  1. 1 cups graham crackers, crushed fine
  2. 2 Tbsp. sugar
  3. ¼ cup melted butter
Chocolate Ganache
  1. 1 1/3 cups semi-sweet or dark chocolate (Ghirardelli preferred)
  2. 2/3 cup heavy cream
  3. 2 tablespoons light corn syrup
  4. 1 tsp. pure vanilla
Peanut Butter Filling
  1. 1 cup creamy peanut butter
  2. 1 8-oz pkg. cream cheese, softened
  3. 1 1/3 cups confectioner’s sugar
  4. 1-8 oz. container Whipped Cream* (Such as Cool Whip)
Topping
  1. 1 oz. Chocolate Shavings
Crust
  1. Preheat oven to 350®F. In a small bowl, mix together graham crackers, sugar and melted butter. Press into a 9-inch pie plate. Bake on middle rack for 12 minutes. Remove from oven and let cool for 15 minutes.
Chocolate ganache
  1. In a medium heat resistant bowl. Combine chocolate pieces and Heavy Whipping Cream. Microwave on medium power for 2 minutes. Remove from the microwave and stir. The chocolate should melt into the whipping cream. If there are still some chocolate pieces, heat the chocolate/whipping cream mixture for another 30 seconds. Continue this process until the chocolate is melted, but not boiling.
  2. Add the corn syrup and vanilla; stir until completely incorporated. While still warm, pour into the prepared crust. Set aside and let it cool.
Peanut butter filling
  1. In a large bowl combine peanut butter and cream cheese. With an electric mixer combine the two until they are smooth. Add powdered sugar and mix until well combined. Lastly, add the whipped cream. Blend it in until it is just combined. Pour mixture carefully over the chocolate ganache and top with chocolate shavings.
  2. Refrigerate for 4 hours.
Notes
  1. It is best when prepared the night before.
  2. *You can make your own fresh whipped cream if you choose to. In medium sized, very cold mixing bowl, add 1 cup Heavy Whipping Cream, 2 Tbsp. sugar and 1 tsp. vanilla extract. With an electric mixer, beat the mixture on medium/high speed until stiff peaks form.
  3. © 2015 Two Chicks from the Sticks
Recipes from Cooks Warehouse https://recipe.cookswarehouse.com/
Posted in Desserts, Recipes | Tagged , , , | Comments Off on Peanut Butter & Chocolate Ganache Pie

Cheesy Cornbread

Cheesy Cornbread
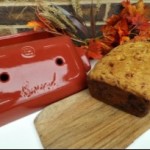
Baking expert Ashley McCord will be joining us on the evening of November 17 at our Decatur location for a cooking class on "The Essentials of Bread Baking". Just in time for your holiday baking, she'll show you how to use the Ankarsrum mixer and Emilie Henry bakeware to make Gluten-Free Sandwich Bread, Garlic Baguette with Freshly Made Cheese, One-Hour Bread with Garlic Honey Butter, Orange-Cranberry Cinnamon Rolls with Cream Cheese Icing, and Chocolate Espresso Cookies. Sign up while seats are still available! In anticipation of the class, she's been playing around in the kitchen! Today she shares this cheesy cornbread recipe that goes great with many of your favorite fall soups and chilis.
Write a review
Print
Prep Time
40 min
Cook Time
50 min
Total Time
1 hr 30 min
Prep Time
40 min
Cook Time
50 min
Total Time
1 hr 30 min
Ingredients
  1. 1 1/2 cups milk
  2. 4 TBSP honey
  3. 2 eggs
  4. 6 TBSP butter, melted
  5. 1 1/2 cups cornmeal
  6. 1 1/2 cups all purpose flour
  7. 2 TBSP baking powder
  8. 1 1/2 tsp salt
  9. 2 cups cheese, shredded
Instructions
  1. Place Emile Henry loaf pan base in the oven and preheat to 400*
  2. Position the double whisk bowl and single wire whips onto the Ankarsrum mixer base Place milk, honey, eggs, and melted butter into the bowl and mix on the lowest speed until well mixed.
  3. Still on the lowest speed, add 1 cup of flour and corn meal mixture, baking powder and salt. Add remaining flour and corn meal until well combined.
  4. Add the cheese and mix just until all is incorporated.
  5. Remove loaf pan base from the oven and place a piece of wax paper in the bottom to cover the holes in the base. Lightly spray with cooking spray.
  6. Pour batter into the pan and smooth on top. Place the lid on the pan and put directly into the oven.
  7. Bake for 40 minutes with the lid on and then remove the lid and bake an additional 5- 10 minutes or until golden brown on top.
  8. Remove from oven and transfer loaf to a cooling rack.
Adapted from The Essentials of Bread Baking Class at The Cook's Warehouse
Recipes from Cooks Warehouse https://recipe.cookswarehouse.com/
Posted in Appetizers, Bread, Recipes | Tagged , , | Comments Off on Cheesy Cornbread

Witch’s Fingers

Witch's Fingers
Last Saturday at our East Cobb store, Chef Stephanie Smithmyer led the "Frightfully Fun Foods" class for kids ages 6 to 9. Our young chefs had a chance to make and enjoy a variety of Halloween-themed recipes such as Eyeball Sliders, Ghoulish Ghoulash, and these tasty (and spooky) Witch's Fingers! Join in on the fun! We have more kids classes coming up this fall. Topics include At-Home Asian, Soups and Sammies, Knife Skills for Teens and Tweens, Holiday Cookie Decorating, and Holiday Treats to Share as gifts - and more!
Write a review
Print
Prep Time
25 min
Cook Time
10 min
Total Time
35 min
Prep Time
25 min
Cook Time
10 min
Total Time
35 min
Ingredients
  1. 10 pretzel rods
  2. 1 bar of Baker’s white chocolate
  3. 3-4 drops green food coloring
  4. 1 drop of yellow food coloring
  5. 10 sliced almonds
  6. Toothpicks
Instructions
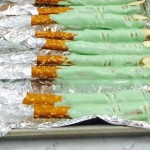
  1. Wrap the ends of the pretzel rods with tin foil, about 2 inches from bottom.
  2. Chop the white chocolate and place in a metal or glass bowl over a pan of simmering water, stirring occasionally. Add the green food coloring and a drop of yellow to get the right color of green. Pour chocolate into a small sheet pan.
  3. Roll the pretzel rods around in the chocolate to cover completely. Place on another parchment lined sheet pan. Place a sliced almond on end of rod to form fingernail. Take a toothpick and make a couple of lines in two places on rod to make knuckle lines.
  4. Let chocolate cool and set up. Remove foil from end so you have a spot to hold your hand to eat your finger!
Recipes from Cooks Warehouse https://recipe.cookswarehouse.com/
Posted in Appetizers, Desserts, Recipes | Tagged , | Comments Off on Witch’s Fingers