
Plum Parsley Salad with Pinot Honey Vinaigrette

Plum Parsley Salad with Pinot Honey Vinaigrette
Serves 6
Stone fruit is one of my favorite fruits, especially plums. And I love to pair them with wine, especially pinot noir. I use Oregon-made Stoller Family Estate Pinot Noir in this recipe. I helped make it during Harvest a couple years ago, and find the full fruit flavor pairs very well with ripe plums. This salad also uses whole, fresh parsley leaves like salad greens. The bright green color pops with the wine-soaked plums. The simple pinot and honey dressing brings it all together for a delicious and show-stopping salad for the table or a fresh, flavorful side for a picnic. Enjoy the rest of the wine while you make it - that's what I do!
Write a review
Print
Ingredients
  1. ¼ cup golden raisins
  2. ⅓ cup Stoller pinot noir
  3. 5-6 ripe plums (depending on size), sliced into ¼" thick wedges
  4. 1 cup whole, fresh Italian parsley leaves, washed and dried
  5. 3 Tablespoons olive oil + more to finish
  6. 3 Tablespoons honey
  7. ½ teaspoon coarsely cracked black pepper
  8. ½ teaspoon Maldon salt
Instructions
  1. Place the raisins in a small bowl and pour the pinot noir over top. Let soak for a couple hours. Remove the raisins with a slotted spoon and reserve the remaining wine for the dressing. **If you don't have time, just add the raisins to the plums and parsley and make the dressing separately.
  2. Place the plums and the parsley in a large mixing bowl.
  3. In a small mixing bowl, whisk together the reserved wine, olive oil, honey and pepper. Pour over the plums and parsley and gently fold together with a rubber scraper or large spoon. Transfer to a serving platter with tongs or large spoon.
  4. Drizzle with a little more olive oil, if desired. Evenly sprinkle the Maldon salt on top. Add more cracked black pepper to suit your taste.
  5. Serve.
Notes
  1. Copyright © 2015 Lovely & Delicious Enterprises, Inc
Recipes from Cooks Warehouse https://recipe.cookswarehouse.com/

Posted in Salads | Tagged , , | Comments Off on Plum Parsley Salad with Pinot Honey Vinaigrette

Red, White & Blue Quick Pops

Red, White & Blue Quick Pops
Yields 3
These American flag inspired Quick Pops are not only festive, but they are also incredibly simple.
Write a review
Print
Ingredients
  1. 12 oz of lemonade
  2. Red food coloring
  3. Blue food coloring
  4. 1 apple or pear for creating the stars
CREATING THE COLORS
  1. Use liquid or gel food coloring to dye lemonade red and blue; plain lemonade will create the white layer. If you are using gel dyes, be sure to thoroughly stir your dyed lemonade to ensure that all of the dye has been dissolved into the liquid.
CUTTING AND APPLYING THE STARS
  1. 1. Slice an apple or pear 1/8 inch thick or less
  2. 2. Lay the fruit flat and cut with the star fruit stencil found in the Zoku Tool Kit
  3. 3. Attach the fruit slices using the end of the fruit wand (also found in the Zoku Tool Kit).
  4. 4. Insert the prepared fruit wand into the pop mold, pressing the fruit star against the wall of the cavity for about 10 seconds. Repeat as desired.
LAYERING
  1. 1. If you want to create a red, white, and blue effect, remember to pour your red lemonade in first. To achieve the look that is seen in the photo, you’ll want to use the following guidelines or you can estimate your desired proportions. Click here for tips to create neat layers.
RED, WHITE, AND BLUE QUICK POPS
  1. 1. Remove your Zoku Quick Pop Maker from the freezer. Apply 3 stars to the top 1/3 of the Zoku Quick Pop cavities using the directions above.
  2. 2. Insert sticks. Pour 1/2 ounce plain lemonade into each Zoku Quick Pop cavity. Allow this layer to freeze completely.
  3. 3. Next, pour 3/4 ounce of red lemonade into each cavity. Allow this layer to freeze completely.
  4. 4. Finally, pour 3/4 ounce of blue lemonade into each cavity, this last layer should reach the fill line. Allow this layer to freeze completely.
  5. 5. Remove the pops with the Super Tool and enjoy.
Notes
  1. NOTE
  2. Since we are using a layered method, the amount of pops you can make per session will be reduced. This is because there is a longer freezing time due to the multiple layers.
  3. HAVE FUN AND BE CREATIVE
  4. We’d love to see your 4th of July Quick Pops, so be sure to upload a photo and share your creations on our Facebook page!
Recipes from Cooks Warehouse https://recipe.cookswarehouse.com/
Posted in Desserts | Tagged , , | Comments Off on Red, White & Blue Quick Pops

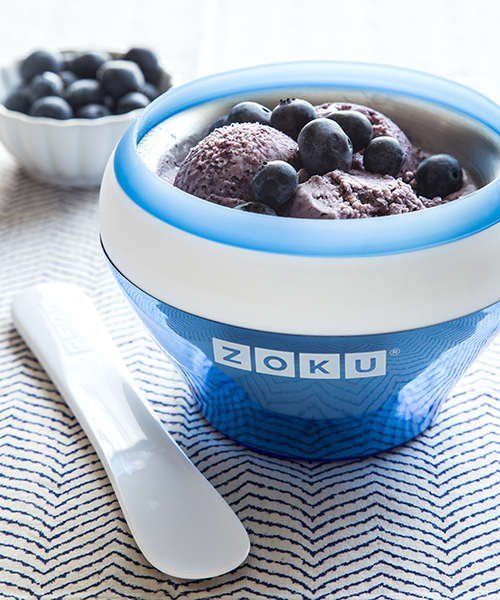
Blueberry Cardamom Ice Cream

Blueberry Cardamom Ice Cream
Make individual portions of delicious frozen treats on any countertop, in as little as 10 minutes with the Zoku Individual Ice Cream Bowls
Write a review
Print
Ingredients
  1. 1 cups heavy cream
  2. ½ cup whole milk
  3. 1/3 cup cane sugar
  4. pinch of salt
  5. 3 large egg yolks, beaten slightly
  6. ½ teaspoon pure vanilla extract
  7. 1 pints fresh blueberries plus more for serving
  8. 2 Tablespoons honey
  9. ¼ teaspoon cardamom
Instructions
  1. In a medium saucepan set over low heat, whisk together heavy cream, milk, sugar and salt until sugar is completely dissolved. Slowly pour 1 cup of the cream mixture into the egg yolks whisking gently to raise the temperature of the egg yolks. Then slowly add egg yolk mixture to the saucepan along with vanilla and cardamom and stir until mixture is thickened enough to coat the back of a spoon. Remove from heat.
  2. Place blueberries and honey in a blender and blend until smooth. Gently fold blueberry mixture into ice cream base and chill for 1-2 hours or until mixture reaches 40 degrees.
  3. Pour 5 fl. oz of mixture into the Zoku Ice Cream Maker and freeze according to instructions. Top with fresh blueberries for serving.
Notes
  1. ©Copyright 2016, Zoku
  2. Makes 1 quart
Recipes from Cooks Warehouse https://recipe.cookswarehouse.com/
Posted in Desserts | Tagged , , , | Comments Off on Blueberry Cardamom Ice Cream